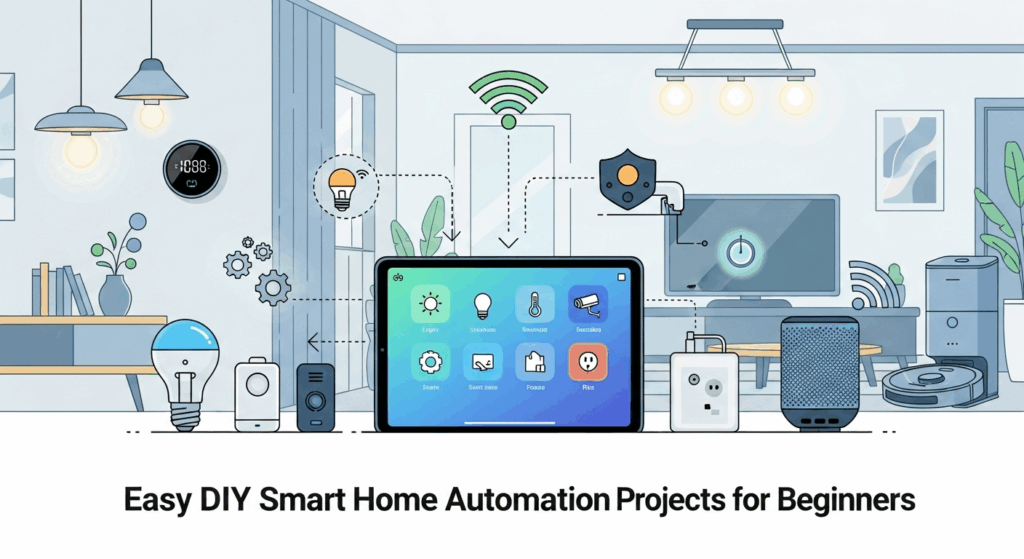
Easy DIY Smart Home Automation Projects for Beginners
The dream of a fully automated home, where lights adjust to the time of day and your coffee maker starts before you're out of bed, often seems like a luxury reserved for the tech-savvy with deep pockets. The market is flooded with slick, pre-packaged systems from giants like Google, Amazon, and Apple, but the cumulative cost can quickly spiral into the thousands. What if you could achieve that same level of convenience, customization, and futuristic flair on a budget? This is where the exciting world of DIY smart home automation projects opens up, offering a rewarding and cost-effective path to building the connected home of your dreams, one project at a time. This guide is designed for the absolute beginner, proving that you don't need a degree in computer science to make your home smarter.
Why Choose DIY Smart Home Automation?
Embarking on a do-it-yourself journey into home automation might seem intimidating, but the benefits far outweigh the initial learning curve. The primary driver for many enthusiasts is cost-effectiveness. A commercial smart lighting kit with a few bulbs and a hub can cost hundreds of dollars, whereas a DIY solution using affordable components can achieve the same, if not more, functionality for a fraction of the price. You buy only the components you need for the specific task, avoiding the bundled, and often unnecessary, extras that come with retail packages. This allows you to scale your smart home at your own pace and budget.
Beyond the financial savings, the level of customization and control you gain is unparalleled. Off-the-shelf systems operate within a "walled garden," limiting you to their approved devices and software features. With DIY, you are the architect. You can mix and match components from different manufacturers, choose the communication protocols that work best for your environment (like Zigbee, Z-Wave, or Wi-Fi), and write automation rules that are perfectly tailored to your unique lifestyle. Want your lights to turn a dim red when your favorite sports team is playing? Or get a notification on your phone only if the garage door is left open for more than 10 minutes after 9 PM? These highly specific scenarios are often difficult or impossible to implement in commercial systems but are standard fare in the DIY space.
Finally, the educational aspect is a significant, and often overlooked, benefit. As you build your projects, you'll gain a fundamental understanding of how these systems work. You'll learn about basic electronics, simple programming concepts, networking, and problem-solving. This knowledge is not only empowering but also makes you a more informed consumer, even if you decide to purchase commercial products later. The satisfaction of building something with your own hands that tangibly improves your daily life is an incredibly rewarding experience that no pre-packaged product can replicate.
Getting Started: Your Beginner's DIY Toolkit
Before you can start automating, you need a few core components. Think of these as the building blocks of your smart home ecosystem. Don't worry, the initial investment is minimal, and these tools will serve you across countless projects.
The Brain: A Central Hub
Every smart home needs a central controller or "hub" to manage all your devices and run your automations. While commercial hubs like the Amazon Echo or Google Nest Hub are popular, the heart of the DIY world is a single-board computer.
The Raspberry Pi is the undisputed champion in this arena. It's a credit-card-sized, low-cost computer that is powerful enough to run sophisticated smart home software. For a beginner, a Raspberry Pi 4 with 2GB or 4GB of RAM is an excellent starting point. You'll also need a microSD card (for the operating system), a power supply, and a case. This tiny computer will run 24/7, acting as the local, private brain of your entire operation, ensuring your smart home works even if your internet goes down.
The Software: Home Assistant
If the Raspberry Pi is the brain, then Home Assistant is the mind. Home Assistant is a free, open-source software platform designed specifically for home automation. It's incredibly powerful and boasts integrations with thousands of devices, both DIY and commercial. Its true strength lies in its ability to bring all your disparate gadgets under one roof, allowing them to communicate and work together.
The learning curve for Home Assistant can seem steep, but its community is vast and supportive, with countless tutorials and guides available online. You install it on your Raspberry Pi, access it through a web browser on your local network, and begin adding devices. The user interface has become increasingly friendly over the years, with many integrations now discoverable automatically, making setup easier than ever. It's the key to unlocking the true potential of your DIY projects.
The Senses and Actions: Sensors and Actuators
A smart home needs to perceive its environment and act upon it. This is done through sensors and actuators.
- Sensors: These are the "senses" of your home. They collect data. Examples include motion sensors (detecting movement), door/window sensors (detecting if they are open or closed), temperature/humidity sensors, and light sensors.
- Actuators: These are the "muscles." They perform an action. Examples include smart plugs (turning power on/off), smart light bulbs (changing color/brightness), relays (acting as electronic switches), and motors (for opening blinds or curtains).
For beginners, starting with Wi-Fi-based devices like Sonoff or Shelly smart plugs and relays, or Aqara Zigbee sensors, is a great entry point. They are inexpensive, reliable, and well-supported by Home Assistant.
Project 1: Smart Lighting on a Budget
Smart lighting is often the "gateway drug" into home automation. It's instantly gratifying and visually impressive. While buying a Philips Hue starter kit is one option, we can do it for much cheaper with more flexibility.
What You'll Need
This project focuses on making an existing lamp "smart" rather than replacing bulbs. It's simpler and more versatile.
- A standard lamp you already own.
- A Wi-Fi smart plug. Brands like TP-Link Kasa, Sonoff S31, or Wyze Plug are excellent, affordable choices. They are often available for under $10.
- Access to your home Wi-Fi network.
- A smartphone for the initial setup.
The Step-by-Step Process
First, follow the manufacturer's instructions to set up the smart plug. This usually involves downloading their app (e.g., the Kasa app), creating an account, plugging the smart plug into an outlet, and connecting it to your Wi-Fi network. Once connected, plug your lamp into the smart plug. You can now turn your lamp on and off using the app from anywhere. This is "remote control," but we want "automation."
Now, let's bring it into our central hub. Open Home Assistant and navigate to the integrations section. Home Assistant will likely auto-discover the Kasa plug on your network. If not, you can manually add the "TP-Link Kasa Smart Home" integration. Once added, your lamp (controlled by the plug) will appear as a "switch" entity in Home Assistant. You've now freed your device from its manufacturer's app and integrated it into your central system.
Taking It Further with Automation
This is where the magic happens. In Home Assistant, go to the "Automations" section and create a new one. Here are a few beginner-friendly ideas:
- Sunset Lighting: Use the built-in "sun" integration as a trigger. Trigger: When the sun sets. Action: Turn on the lamp switch. Now, your lamp will automatically turn on at sunset every day, adjusting its timing throughout the year.
- "Welcome Home" Scene: If you have the Home Assistant companion app on your phone, you can use your phone's location as a trigger. Trigger: When you enter your "home zone." Action: Turn on the lamp.
- Simple Security: If you also have a motion sensor, you can link them. Trigger: When motion is detected between 10 PM and 6 AM. Action: Turn on the lamp.
Project 2: Intelligent Outlets for "Dumb" Appliances
Building on the previous project, smart plugs can do more than just control lamps. They can grant a new lease of life to any simple electronic device that has a physical power switch, making your "dumb" appliances smart.
The Concept and Components
The principle is identical to the smart lighting project. The smart plug acts as a computer-controlled gatekeeper for electricity. Any device that will resume its function when power is restored can be made smart. Think fans, coffee makers (the simple drip kind with a toggle switch, not a digital one), electric kettles, and even radios.
The components remain the same: a Wi-Fi smart plug and your central hub (a Raspberry Pi running Home Assistant). For this project, it's worth considering a smart plug with energy monitoring, like the Sonoff S31 or Shelly Plug S. These can report how much power the connected appliance is using, which opens up a whole new world of automation possibilities and helps you track your energy consumption.
Setting Up an Automated Coffee Maker

Let's automate a morning routine. Take a basic drip coffee maker with a physical "on/off" switch. The night before, fill it with water and coffee grounds and leave its switch in the "on" position. Since it's plugged into the smart plug (which is off), the machine won't start.
Integrate the smart plug into Home Assistant, just as you did with the lamp project. Now, you can create a time-based automation. Trigger: When the time is 6:30 AM on weekdays. Action: Turn on the coffee maker smart plug. You will now wake up to the smell of freshly brewed coffee every morning, without touching a thing.
Advanced Energy-Monitoring Automations
If you used a plug with energy monitoring, you can create more intelligent automations. For example, you can get a notification when your laundry is done. Plug your washing machine into the energy-monitoring smart plug. Run a cycle and watch the power consumption in Home Assistant. You'll notice the power draw is high during the main cycle and then drops to a near-zero level for a sustained period when it's finished.
You can create an automation based on this. Trigger: When the washing machine's power consumption drops below 5 watts for more than 2 minutes. Condition: Only if the power was previously above 50 watts (to ensure it was actually running a cycle). Action: Send a notification to your phone saying, "The laundry is finished." This is a perfect example of a truly smart automation that goes beyond simple timers.
Project 3: A Simple DIY Smart Security Sensor
A full-blown security system can be complex and expensive. However, you can build a surprisingly effective and simple notification system using just a few affordable sensors. This project will alert you to any unexpected entry into your home.
Gathering Your Security Sensors
For this project, we'll move away from Wi-Fi to a more robust protocol for battery-powered sensors: Zigbee. Zigbee devices create a mesh network, meaning they can relay signals through each other, improving reliability and range. They are also extremely low-power, so a battery can last for a year or more.
You will need:
- A Zigbee USB Coordinator. This plugs into your Raspberry Pi and allows it to communicate with Zigbee devices. The Sonoff Zigbee 3.0 USB Dongle Plus is a fantastic, low-cost choice.
- One or more Zigbee door/window sensors. Aqara makes very popular and reliable ones. These come in two parts; one attaches to the door/window, the other to the frame. They use a magnet to detect if it's open or closed.
- One or more Zigbee motion sensors. Again, Aqara is a great brand to start with.
Integrating Zigbee into Home Assistant
First, plug your Zigbee USB dongle into your Raspberry Pi. In Home Assistant, you'll need to install an integration to manage it. The most popular choice is ZHA (Zigbee Home Automation), which is now built into Home Assistant. In the settings, you can configure ZHA and tell it which USB port your dongle is connected to.
Once ZHA is running, you can start "pairing" your devices. Put your Aqara door sensor into pairing mode (usually by holding a small button) and tell Home Assistant to search for new devices. It will appear as a binary sensor with two states: `on` (open) and `off` (closed). Repeat the process for your motion sensor, which will also appear as a binary sensor with states for `on` (motion detected) and `off` (clear).
Creating Security-Based Notifications
With your sensors integrated, you can now build powerful security automations. A common use case is an "Away Mode." You can create a toggle switch in the Home Assistant dashboard called "Away Mode." When you leave the house, you turn this on.
Here's a sample automation:
- Trigger: The state of the front door sensor changes to `on` (open).
- Condition: The "Away Mode" switch is `on`.
- Action: Send a high-priority notification to your phone with the message, "ALERT: Front door opened while in Away Mode."
- Action (optional): If you have smart lights, flash all the lights in the house red.
Similarly, you could set up a a motion-based alert that only works at night. Trigger: Motion detected in the living room. Condition: Time is between 11 PM and 6 AM. Action: Send a notification. These simple alerts provide peace of mind and are a fantastic introduction to a more comprehensive DIY security setup.
—
Comparison of DIY Smart Home Hubs and Protocols
When starting your journey, choosing the right foundational technology is key. The table below compares the most common platforms and communication protocols for beginners.
| Category | Option 1: Raspberry Pi | Option 2: Arduino/ESP32 | Option 3: Wi-Fi | Option 4: Zigbee/Z-Wave |
|---|---|---|---|---|
| Type | Single-Board Computer (Hub) | Microcontroller (Device Brain) | Communication Protocol | Communication Protocol |
| Primary Use | Running a central server like Home Assistant. Manages the entire home. | Powering a single, specific DIY device (e.g., a custom sensor or display). | Device-to-router communication. | Low-power mesh networking for sensors and battery devices. |
| Ease of Use | Moderate. Requires setup but is GUI-driven once running. | Difficult. Requires coding in C++/MicroPython. | Easy. Plugs directly into your existing network. | Moderate. Requires a coordinator/hub. |
| Cost | Moderate ($35 – $75 for the board). | Very Low ($2 – $15 per board). | Low (embedded in device). | Low-to-Moderate (device cost + coordinator). |
| Best For… | The brain of your entire smart home. Essential for a robust system. | Creating highly custom, one-off smart devices from scratch. | Mains-powered devices that need high bandwidth (cameras, smart plugs). | Large networks of battery-powered sensors (door, motion, temp). |
| Key Weakness | Initial setup can be tricky for non-tech users. | Not suitable for running a full home automation server. | Can congest your Wi-Fi network. Devices are "dumber" without a hub. | Requires a dedicated hub/coordinator. Not every device supports it. |
—
Frequently Asked Questions (FAQ)
Q: Is this really cheaper than just buying a Google Home or Amazon Echo system?
A: Yes, significantly, especially as you scale. While a single smart speaker is cheap, outfitting your whole home with their branded light bulbs, plugs, and sensors becomes very expensive. With DIY, a $50 Raspberry Pi and a $20 Zigbee dongle can control hundreds of dollars worth of cheap, effective sensors and relays, offering far more power and customization for less money in the long run.
Q: Do I need to know how to code to do these projects?
A: No, not for the projects listed here. Modern platforms like Home Assistant have powerful graphical user interfaces (GUIs) for creating automations. You'll be using dropdown menus and simple logic blocks (if this, then that), not writing lines of code. Coding becomes an option only if you want to create extremely complex automations or build your own devices from scratch with platforms like Arduino.
Q: Is it safe to have these DIY devices on my home network?
A: It is safer, in many ways, than commercial cloud-based products. The core philosophy of a Home Assistant-based DIY system is local control. Your automations run on the Raspberry Pi inside your home, not on a server in another country. This means your data is private, and your core automations will continue to work even if your internet connection goes down. The biggest security risk is ensuring your home network itself is secure with a strong Wi-Fi password.
Q: What is the difference between Zigbee, Z-Wave, and Wi-Fi?
A: They are all wireless communication protocols.
- Wi-Fi: High bandwidth, connects directly to your router. Great for things that need lots of data (like cameras) or are always plugged in. Its downside is that it can be power-hungry and clog up your network if you have too many devices.
- Zigbee & Z-Wave: Low-power mesh networks. They are designed for home automation. Devices use very little battery and can relay messages through each other to extend the network's range. They are ideal for battery-powered sensors. The main difference is that Z-Wave is a proprietary standard (more controlled, sometimes more expensive) while Zigbee is an open standard (more variety, generally cheaper).
Conclusion
Stepping into the world of DIY smart home automation projects is a journey of creativity, learning, and empowerment. It transforms the idea of a smart home from a costly consumer product into an engaging and personalized hobby. By starting small with a simple smart plug, graduating to sensors, and building everything around a powerful local hub like Home Assistant, you can create a system that is more capable, more private, and more a-la-carte than any commercial offering. The initial learning phase pays dividends in the long run, giving you complete control over your home's environment. So, grab a Raspberry Pi, a few sensors, and start building. Your future, smarter self will thank you.
***
Summary
This article, "Easy DIY Smart Home Automation Projects for Beginners," serves as a comprehensive guide for individuals new to the world of home automation. It demystifies the process by breaking it down into manageable steps, emphasizing the core benefits of a DIY approach: significant cost savings, unparalleled customization, and the rewarding experience of learning a new skill. The guide outlines the essential beginner's toolkit, centered around a Raspberry Pi as the local hub and Home Assistant as the open-source software brain.
The article then walks the reader through three practical, step-by-step projects. The first project covers Smart Lighting using a simple Wi-Fi smart plug to control a lamp, demonstrating how to create automations for sunset lighting and "welcome home" scenes. The second project expands on this by using smart plugs to make "dumb" appliances like coffee makers and fans intelligent, even introducing energy-monitoring plugs for advanced automations like laundry notifications. The third project introduces Zigbee technology for a simple but effective DIY Security System, using door and motion sensors to send alerts to the user's phone.
To provide further context, the article includes a detailed comparison table contrasting different platforms (like Raspberry Pi vs. Arduino) and communication protocols (Wi-Fi vs. Zigbee/Z-Wave). It concludes with a helpful FAQ section addressing common beginner concerns about cost, coding requirements, and network security. The overall message is one of empowerment, showing that a powerful, private, and highly customized smart home is well within reach for any enthusiastic beginner.
